
Users
On this page
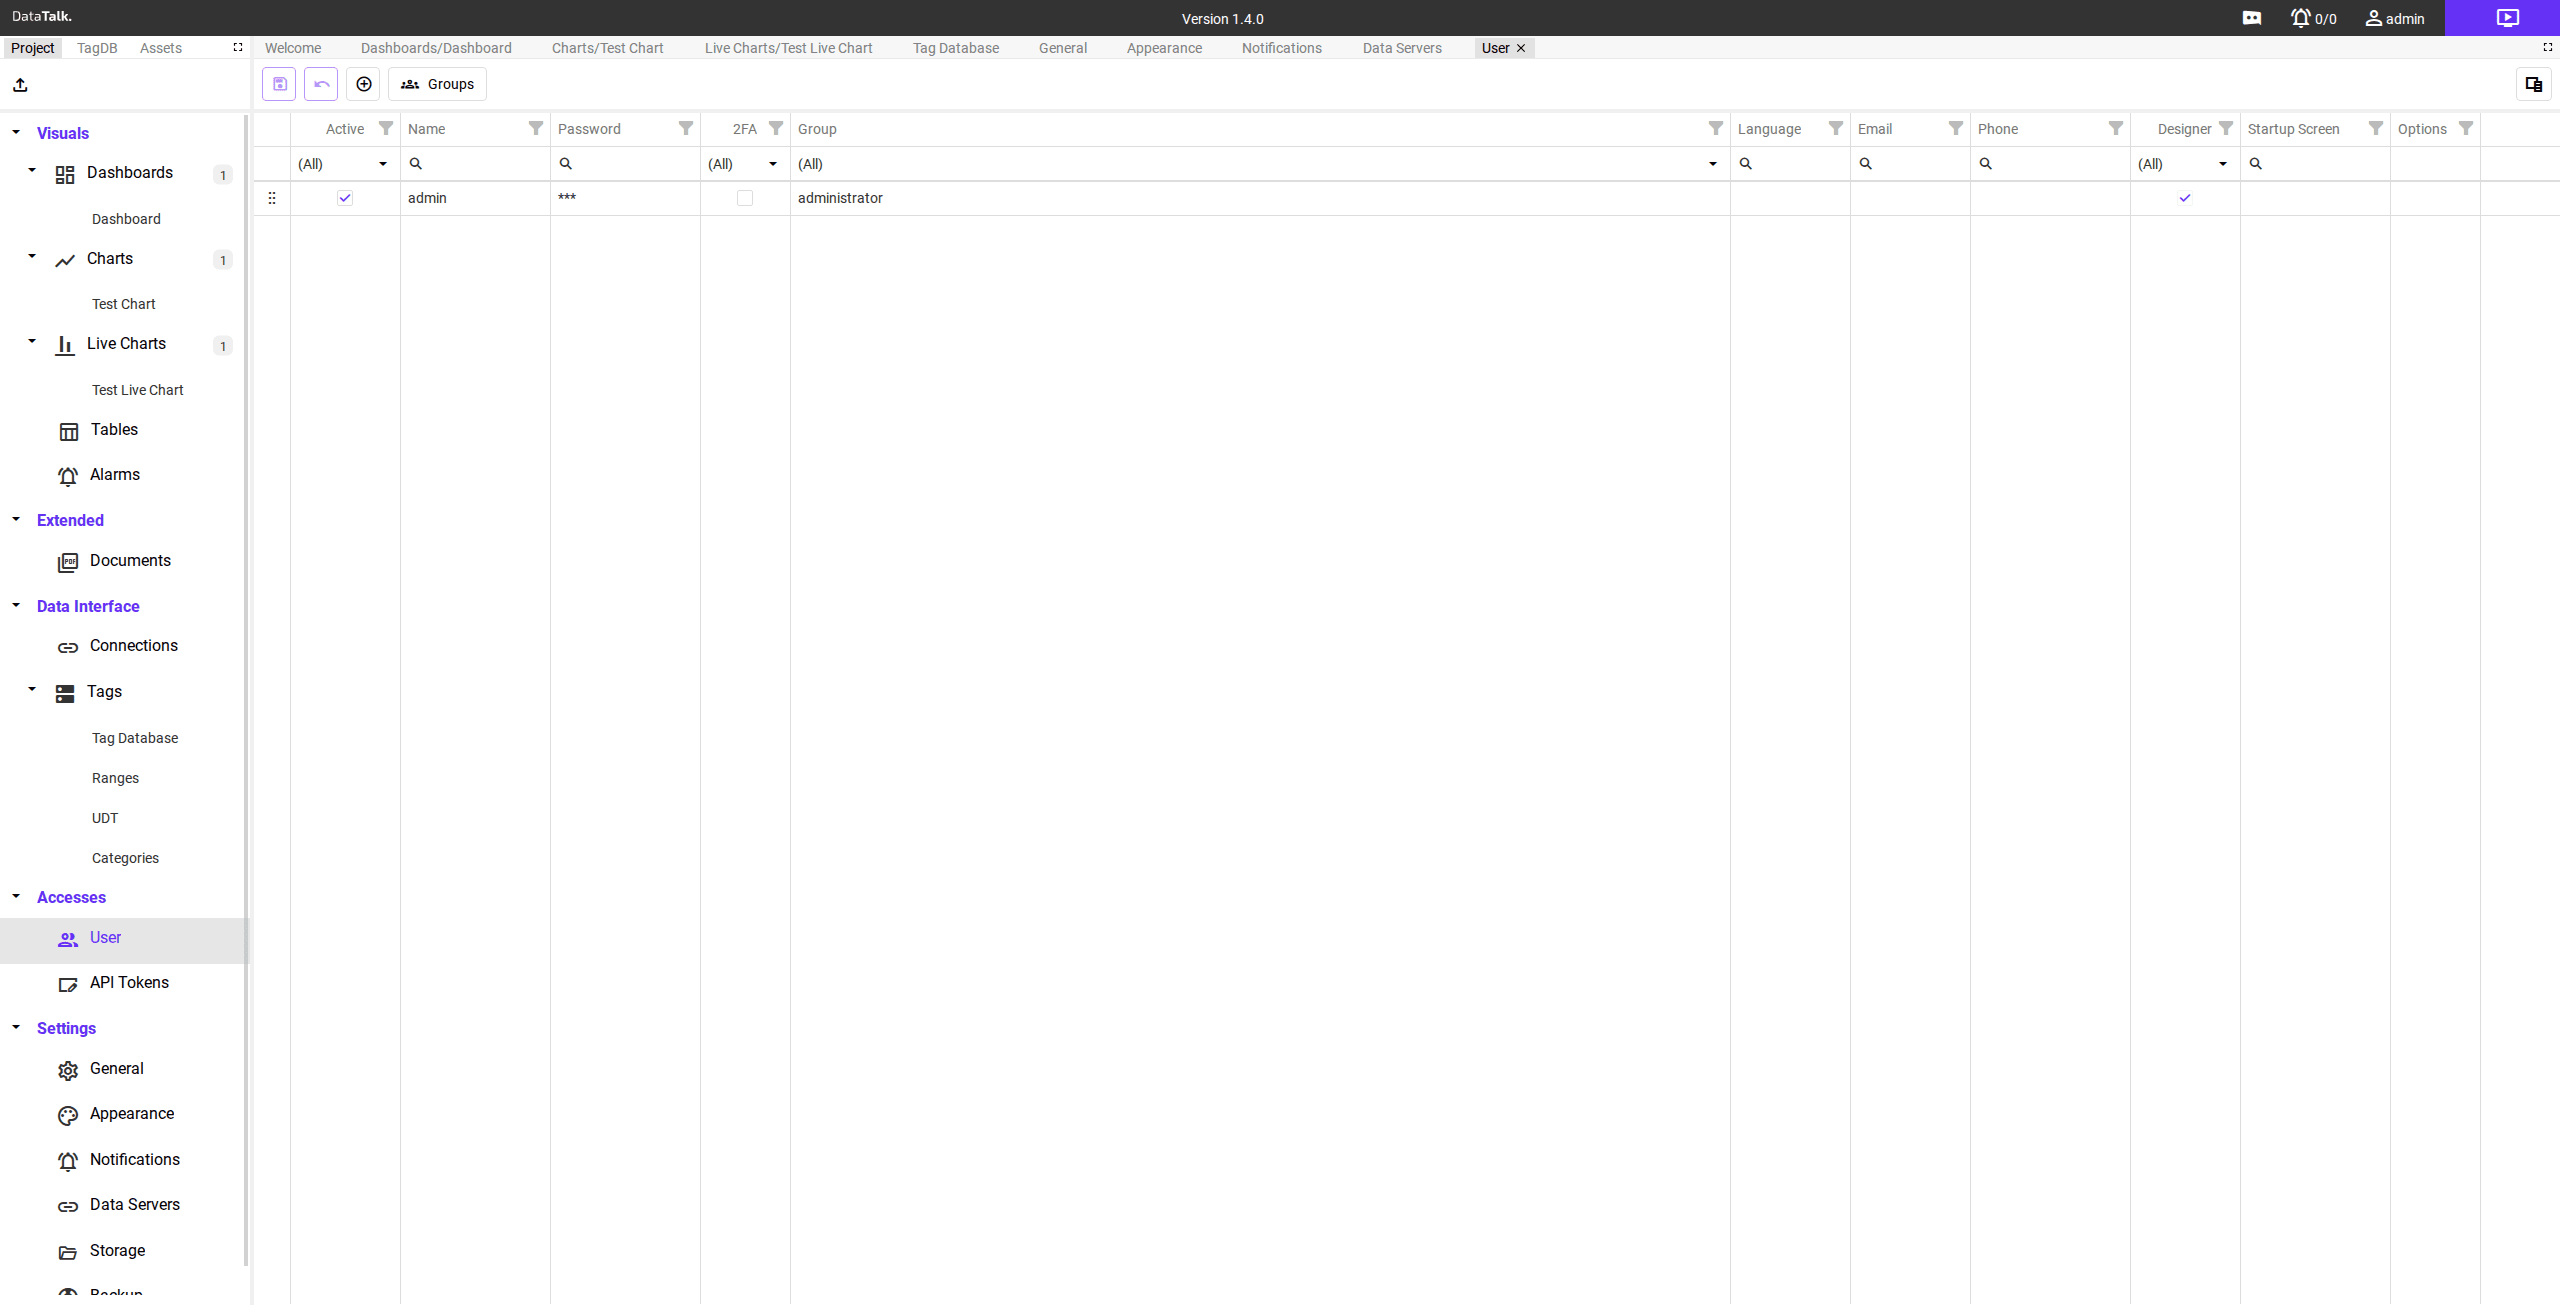
The Users page manages all user accounts in the project. Administrators can create, edit, and delete users, assign roles and groups, configure two-factor authentication, and control per-user preferences from this single page.
User grid
Each row in the user grid represents one account. The columns are:
Active — checkbox indicating whether the account is enabled. Unchecking this disables the account without deleting it.
Name — the username used to log in.
Password — the account password, displayed as asterisks. Click the field to change the password.
2FA — indicates whether two-factor authentication is enabled for this user.
Group — the group this user belongs to. Groups control notification targeting — alarm channels can be directed to an entire group so all members receive alerts.
Language — the interface language assigned to this user. The language must first be added to the project in Settings → General.
Email — the user’s email address, used for email-based alarm notifications.
Phone — the user’s phone number, used for SMS-based alarm notifications.
Designer — when checked, grants the user full project editing privileges. Designers can modify views, tags, alarms, and all project configuration. Apply this permission carefully.
Startup Screen — the view this user sees immediately after logging in. When set, it overrides the system-wide default configured in Settings → General.
Options — action buttons to edit or delete the account.
Adding and editing users
Navigate to Accesses → Users.
Click Add to open the user creation form. Fill in the username, password, and any other required fields.
Select the appropriate group and set the Designer permission if the user needs project editing access.
Click Save to create the account. The new user appears in the grid immediately.
To edit an existing user, click the edit button in the Options column of that user’s row.
Groups tab
The Groups tab lists all user groups defined in the project. Groups are the primary mechanism for routing alarm notifications — notification channels can target a group so every member receives the alert.
To create a group, switch to the Groups tab and click Add. Give the group a descriptive name (for example maintenance or shift-supervisors), then assign users to it from their individual account settings.
The groups defined here are the same groups available when configuring alarm notification channels. A user must be a member of the group assigned to a notification channel in order to receive alerts from that channel.
User roles
The Group field on each account determines the user’s role:
administrator — full access to all project features, settings, and configuration. The built-in admin account belongs to this group.
Other groups with restricted access can be created as needed to limit what operators can view or change.