
Forwarding data to an MQTT broker
Configure the DataTalk gateway to actively push tag values to any external MQTT broker — Mosquitto, HiveMQ, EMQX, or cloud MQTT services.
On this page
The MQTT gateway type connects the DataTalk gateway as an MQTT client that publishes tag values to a broker you control. This is the active outbound direction — the gateway initiates the connection and pushes data on a timer or trigger. It is distinct from the built-in MQTT Broker under Settings, which makes the gateway itself into a broker that other clients connect to.
Use the MQTT gateway type when:
- You have an existing MQTT broker that other systems already subscribe to
- You need to aggregate data from multiple DataTalk gateways into one broker
- You are integrating with a cloud MQTT service (HiveMQ Cloud, AWS IoT Core via MQTT, etc.)
- You need bidirectional MQTT — the Listen tab lets you subscribe to topics from the same broker
Prerequisites
- A running MQTT broker accessible from the DataTalk gateway network (IP address and port)
- Broker credentials if authentication is required
- At least one Connection configured with tags reading correctly
Configuration
In the project tree, expand Data Interface → Gateway and double-click Gateway.
Select MQTT from the Type dropdown. The connection fields update to show MQTT-specific settings.
Fill in the Connection tab:
- Server URL — IP address or hostname of your broker (e.g.,
192.168.1.10orbroker.hivemq.com) - Port —
1883for plain MQTT,8883for MQTT over TLS - Client ID — optional; leave blank to auto-generate, or set a fixed name if your broker tracks client sessions
- User / Password — fill in if your broker requires authentication; leave empty for anonymous access
You can also use the DataTalk built-in MQTT broker as your target. Enable it under Settings → Data Servers — it runs by default at 127.0.0.1 on port 1883. This is convenient for local integrations where another application on the same host subscribes to the data.
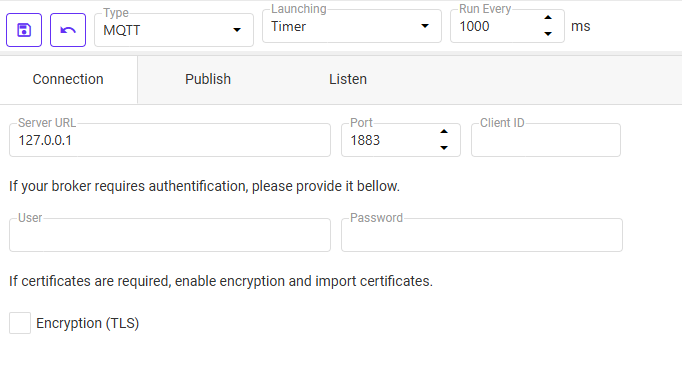
Check Encryption (TLS) if connecting over port 8883 or to a broker that requires TLS. Import the CA certificate (and optionally a client certificate) in the fields that appear.
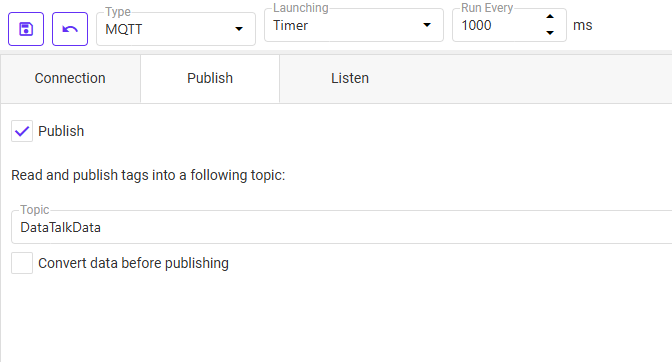
Switch to the Publish tab:
- Topic — the MQTT topic path to publish to (e.g.,
datatalk/plant1/tags). Subscribers on this topic will receive the tag values. - Convert data before publishing — enable to transform the payload format before sending (useful when the target subscriber expects a specific JSON schema).
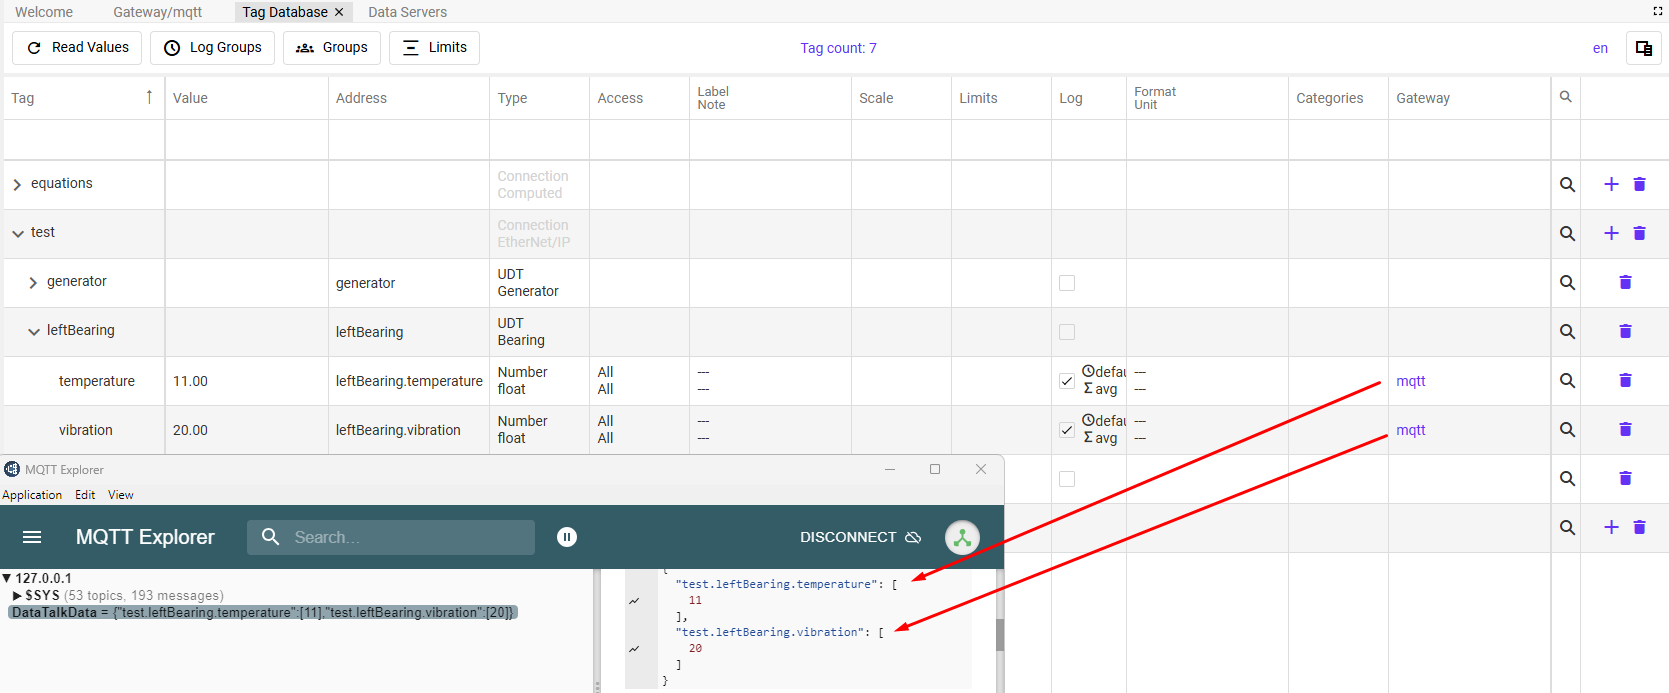
Navigate to the Tag Database and in the Gateway column assign the name of the MQTT gateway you created. The system will begin publishing the selected tag values to the MQTT broker.
If you need the gateway to receive data back from the broker — for example setpoints or commands published by a cloud platform — switch to the Listen tab and configure which topics to subscribe to. Received values are written back into the Tag Database as tag values.

Set Launching to Timer and Run Every to your desired interval in milliseconds (e.g., 1000 for one reading per second).
Click Save. The gateway connects to the broker and starts publishing immediately.
Verifying the connection
Use any MQTT client to confirm data is arriving:
- MQTT Explorer (desktop) — connect to the same broker and subscribe to
#to see all incoming topics - Mosquitto CLI —
mosquitto_sub -h <broker-ip> -t '#' -v - Node-RED — add an MQTT-in node and wire it to a Debug node
Each message is a JSON payload containing the current tag values. Confirm they match the DataTalk Tag Database → Read Values tab.
Use the MQTT Broker (Settings → Data Servers) when external clients need to subscribe to live data on their own schedule — the gateway is passive and clients connect to it.
Use the MQTT gateway type (Data Interface → Gateway) when you need the gateway to actively push data to a specific broker — the gateway is the initiating client. This is also the right choice when you want to aggregate multiple gateways into one central broker, or when your broker is on a different network that the gateway can reach but clients cannot.