
Forwarding data to Amazon AWS IoT Core
Step-by-step guide to connecting the DataTalk gateway to AWS IoT Core using certificate-based authentication and streaming tag values as MQTT telemetry.
On this page
This guide walks through connecting the DataTalk gateway to Amazon AWS IoT Core so that tag values are forwarded as MQTT telemetry messages. AWS IoT Core uses mutual TLS authentication with device certificates — you will create a Thing in AWS, download three certificate files, and upload them into DataTalk.
What you need
- An AWS account with IoT Core enabled in your target region
- Permissions to create IoT Things, certificates, and policies in AWS IAM/IoT
- The DataTalk gateway configured with at least one Connection and tags reading correctly
Step 1 — Create a Thing and download certificates in AWS
Log in to the AWS console, navigate to IoT Core, and select your target region in the top-right corner. All subsequent steps must be in the same region.
Go to Manage → Things → Create things. Select Create a single thing. Give it a name — for example datatalk-gateway-plant1 — and click Next.
On the certificate step, choose Auto-generate a new certificate. Click Next.
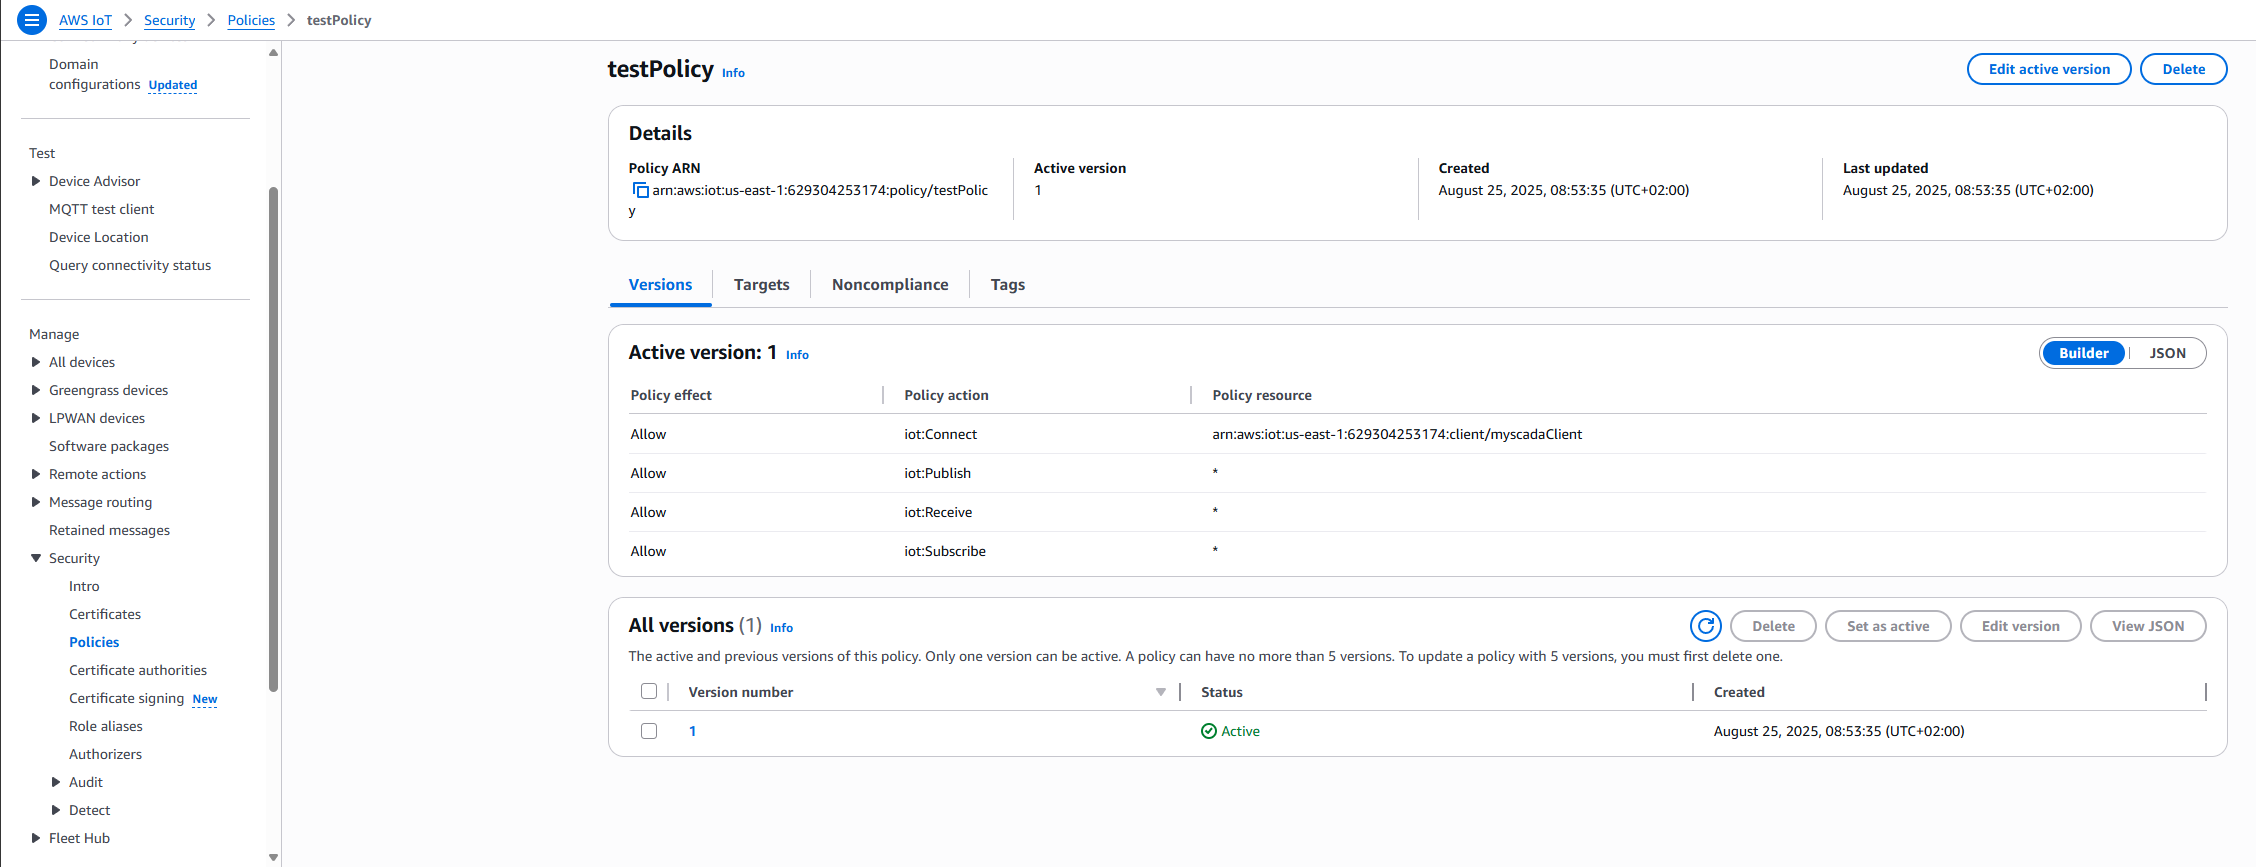
Create or select a policy that allows iot:Connect, iot:Publish, iot:Subscribe, and iot:Receive actions. A minimal policy for a single device:
{
  "Version": "2012-10-17",
  "Statement": [{
    "Effect": "Allow",
    "Action": ["iot:Connect", "iot:Publish"],
    "Resource": "*"
  }]
}
Attach the policy to the certificate and click Create thing.
AWS shows the download page only once. Download all three files before clicking Done:
- Device certificate — filename ends in
-certificate.pem.crt→ this is your Certificate (.cert) - Private key — filename ends in
-private.pem.key→ this is your Private Key (.key) - Root CA certificate — click Download next to Amazon Root CA 1 → this is your Certification Authority (.ca)
Store these files securely. The private key cannot be re-downloaded after you leave this page.
In IoT Core, go to Settings (bottom of the left menu). Copy the Device data endpoint — it looks like xxxxxx-ats.iot.us-east-1.amazonaws.com. You will paste this into DataTalk.
Step 2 — Configure the Gateway in DataTalk
In the DataTalk project tree, expand Data Interface → Gateway and double-click Gateway to open the configuration panel.
In the Type dropdown at the top, select Amazon AWS IoT. The connection fields update to show the AWS-specific form.
Paste your IoT Core endpoint into the Host field:
xxxxxx-ats.iot.us-east-1.amazonaws.comThe endpoint and certificates can also be found in the AWS console under AWS IoT → Security → Policies.
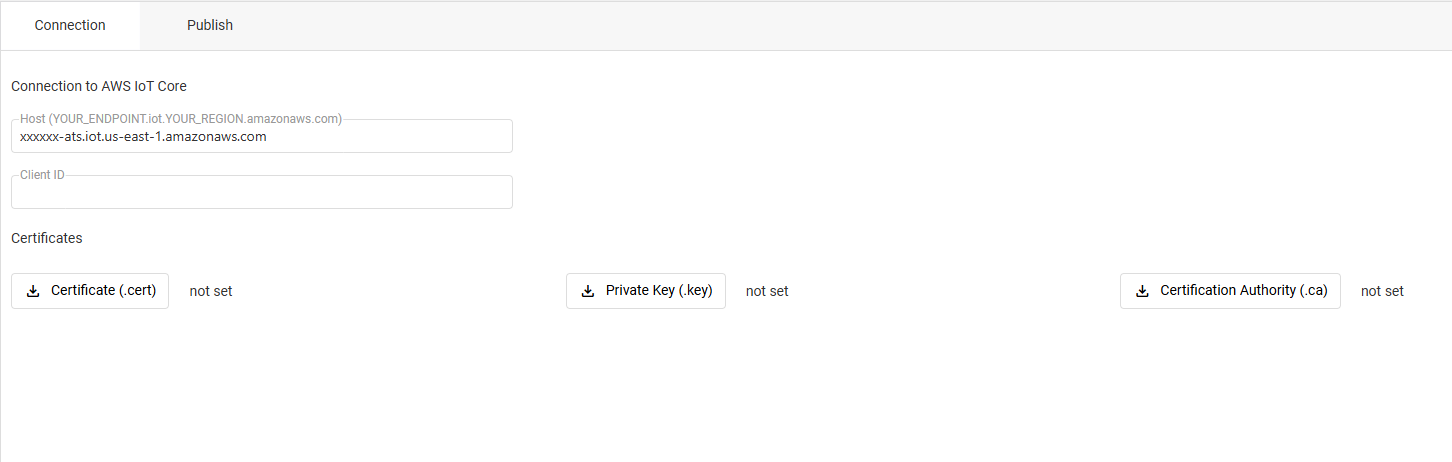
Enter the Thing name you created in AWS — for example datatalk-gateway-plant1. This must match the Thing name exactly, as AWS IoT policies often scope permissions by Thing name.
Only one device can use the same Client ID at the same time. If two gateways connect with the same Client ID, AWS IoT Core will disconnect the first connection when the second one arrives. Use a distinct name for each DataTalk gateway instance.
Click each upload button and select the corresponding file downloaded from AWS:
- Certificate (.cert) — the
-certificate.pem.crtfile - Private Key (.key) — the
-private.pem.keyfile - Certification Authority (.ca) — the
AmazonRootCA1.pemfile
Set Launching to Timer and Run Every to your desired interval in milliseconds (e.g., 1000 for one second).
Click the Publish tab to select which tags to include in each message and configure the MQTT topic they are published to.
Click Save. The gateway establishes a TLS connection to AWS IoT Core and begins publishing telemetry.

Step 3 — Verify data in AWS
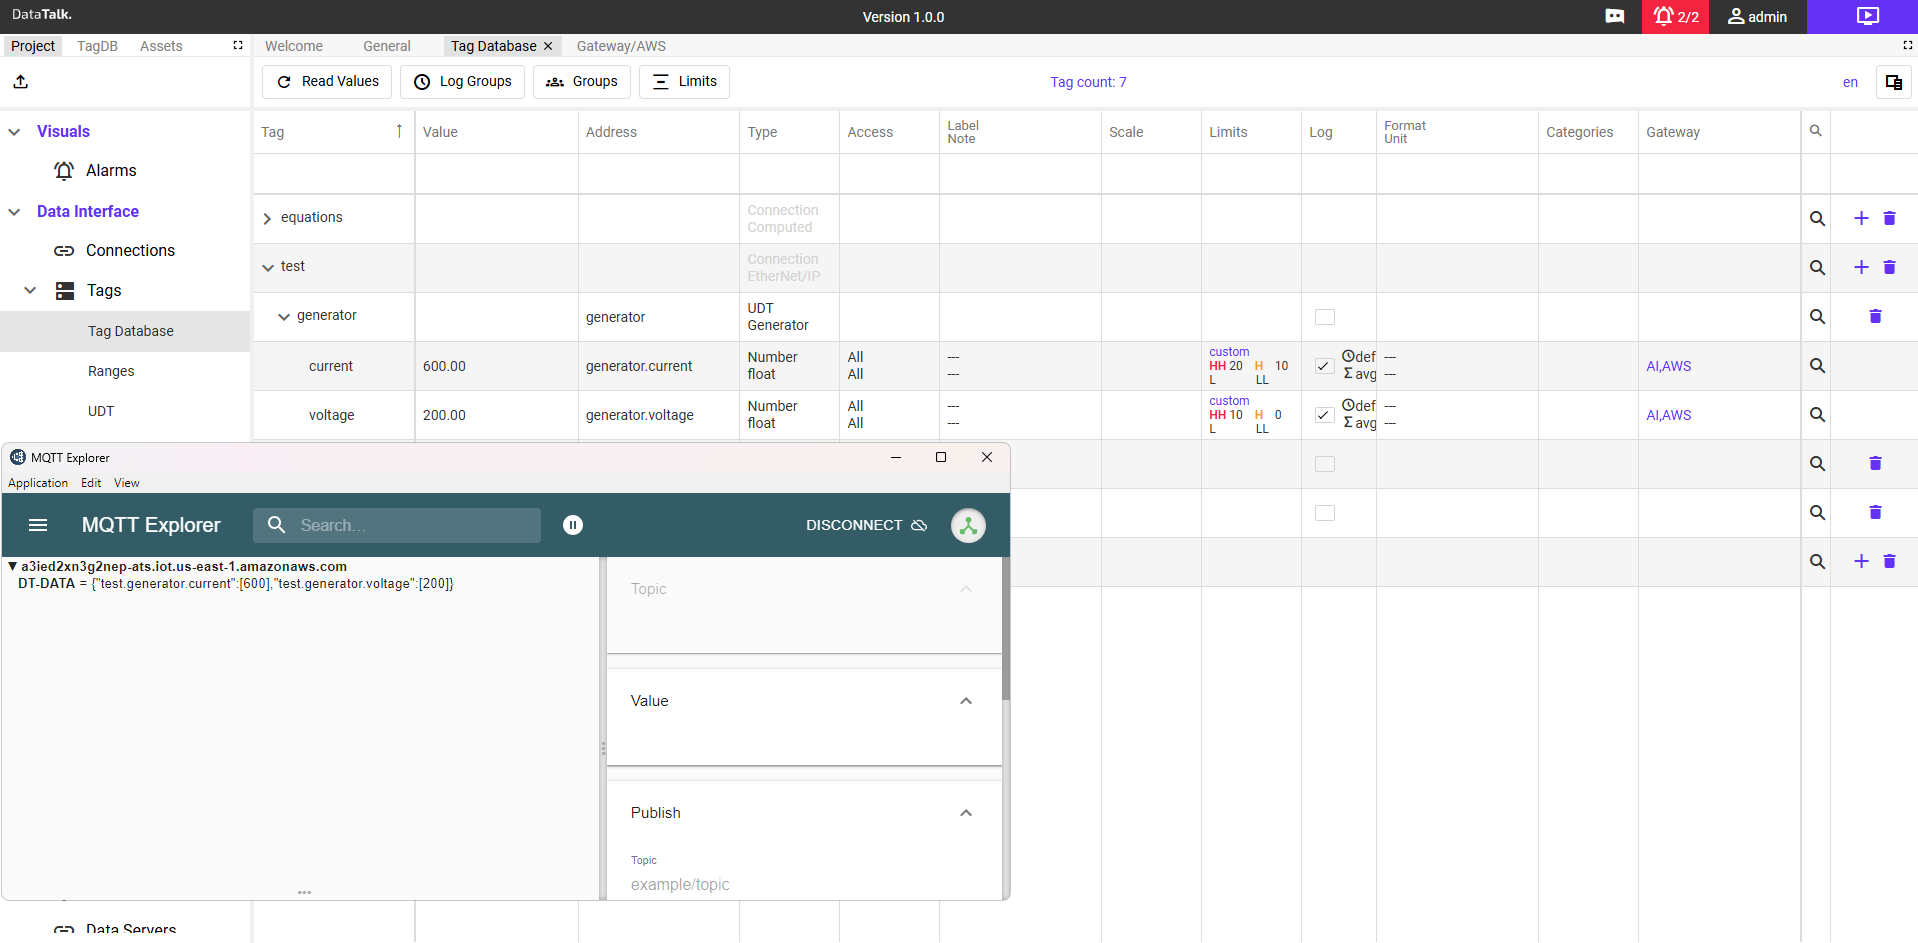
In the AWS IoT Core console, go to Test → MQTT test client. Subscribe to # (all topics) or the specific topic DataTalk is publishing to.
Messages from DataTalk should appear within the configured interval. Each message is a JSON payload with the current tag values. Confirm names and values match the DataTalk Tag Database → Read Values.
Routing data with IoT Rules
Once data arrives in AWS IoT Core, use Message Routing → Rules to send it to downstream AWS services:
- Amazon DynamoDB — persist every tag reading as a time-series record
- Amazon S3 — batch-archive messages for long-term storage or export
- Amazon Kinesis Data Streams — high-throughput stream processing
- AWS Lambda — custom processing, alerting, or forwarding to other services
- Amazon Timestream — purpose-built time-series database for IoT telemetry
Keep the private key file secure — it authenticates your gateway to AWS and cannot be re-downloaded. If compromised, revoke the certificate in the AWS IoT Core console under Security → Certificates and generate a new one.
Always use the endpoint for the region where your Things are registered. Data published to a wrong-region endpoint will fail silently — the connection will be refused. Double-check the region in the endpoint URL matches your IoT Core region.