
Reports
Create and manage report templates — configure output format, schedule, and delivery.
The Reports section manages report definitions and their generation schedule. A report in Connect, Log & Report consists of a Word document template (.docx) that you design in Microsoft Word and a set of scheduling and output settings that control when and how the report is generated.
When the report runs, the engine takes the template, replaces every {placeholder} expression with real data from the Tag Database, renders the output, and saves the finished file to the internal store (accessible in View Mode → Files).
See Template Design for how to author the Word template and insert placeholders. See Function Reference for the full list of available blocks and their parameters.
Report name and ID
Each report has a Name (displayed in the nav tree) and a unique ID assigned at creation. The ID can be used to trigger report generation on demand via the API or a custom script, independent of any automatic schedule.
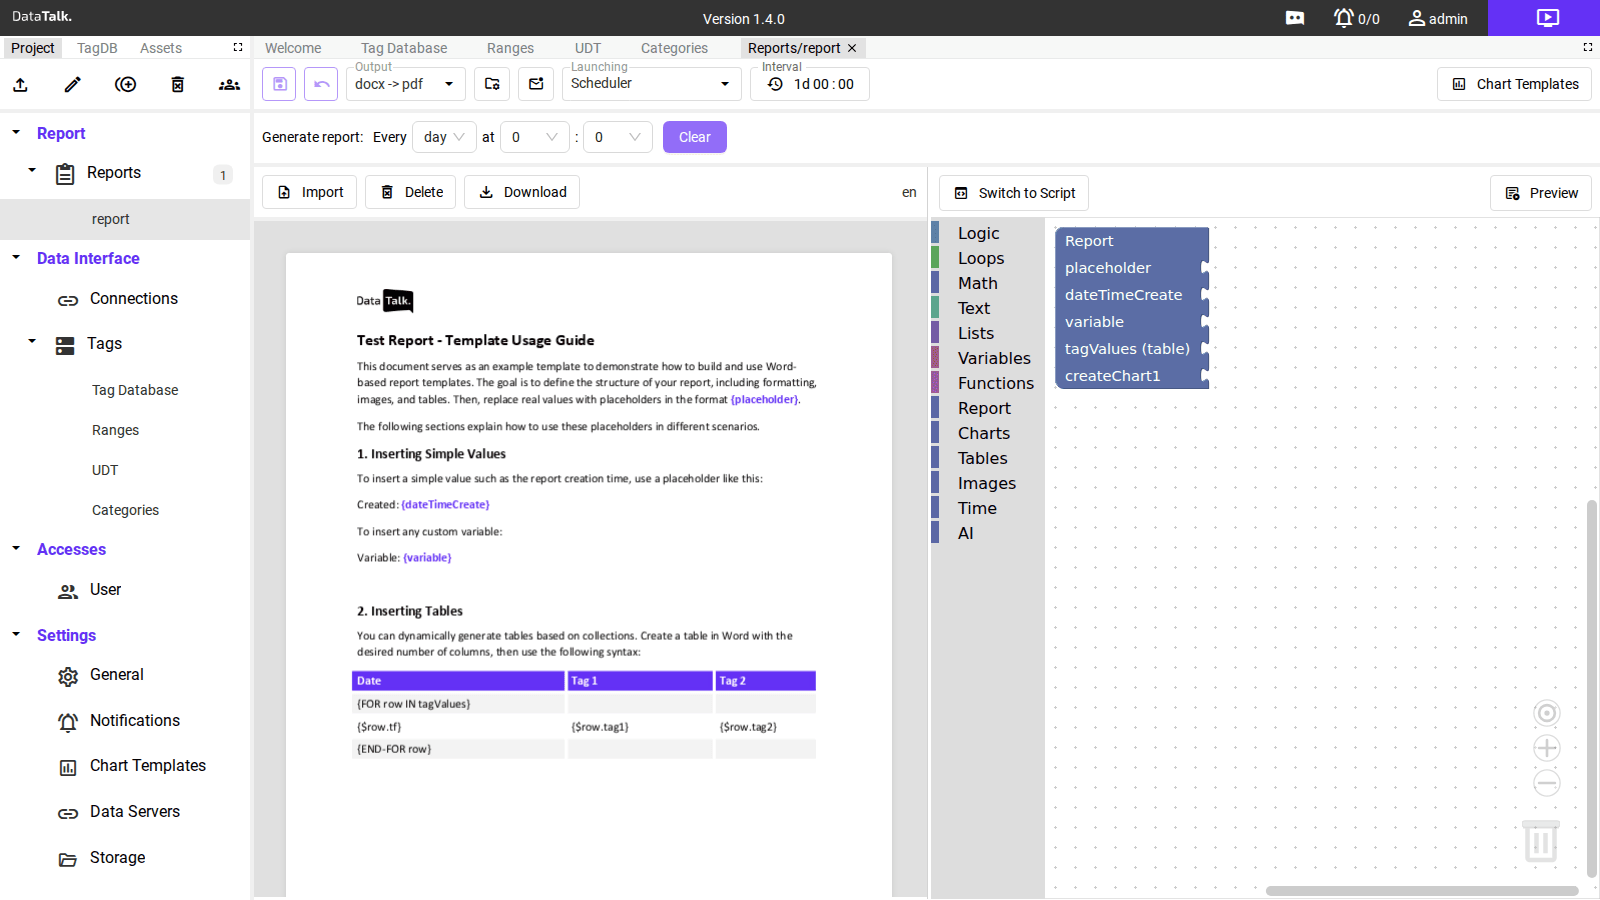
The editor opens with a dual-pane layout: the left pane shows a pre-filled sample .docx template demonstrating basic placeholder functionality, and the right pane hosts the online drag-and-drop block editor for configuring data mapping.
Report list
Under Report → Reports in the nav tree, all report definitions are listed. Each report appears as a child item with its name. The badge next to Reports shows the total count.
Double-click a report to open it in the editor.
Creating a new report
Click the + icon next to Reports in the nav tree. A new empty report entry is created.
Click Import to upload a .docx file designed in Microsoft Word. The document immediately appears in the preview panel. Placeholders show in purple to indicate they will be resolved at generation time.
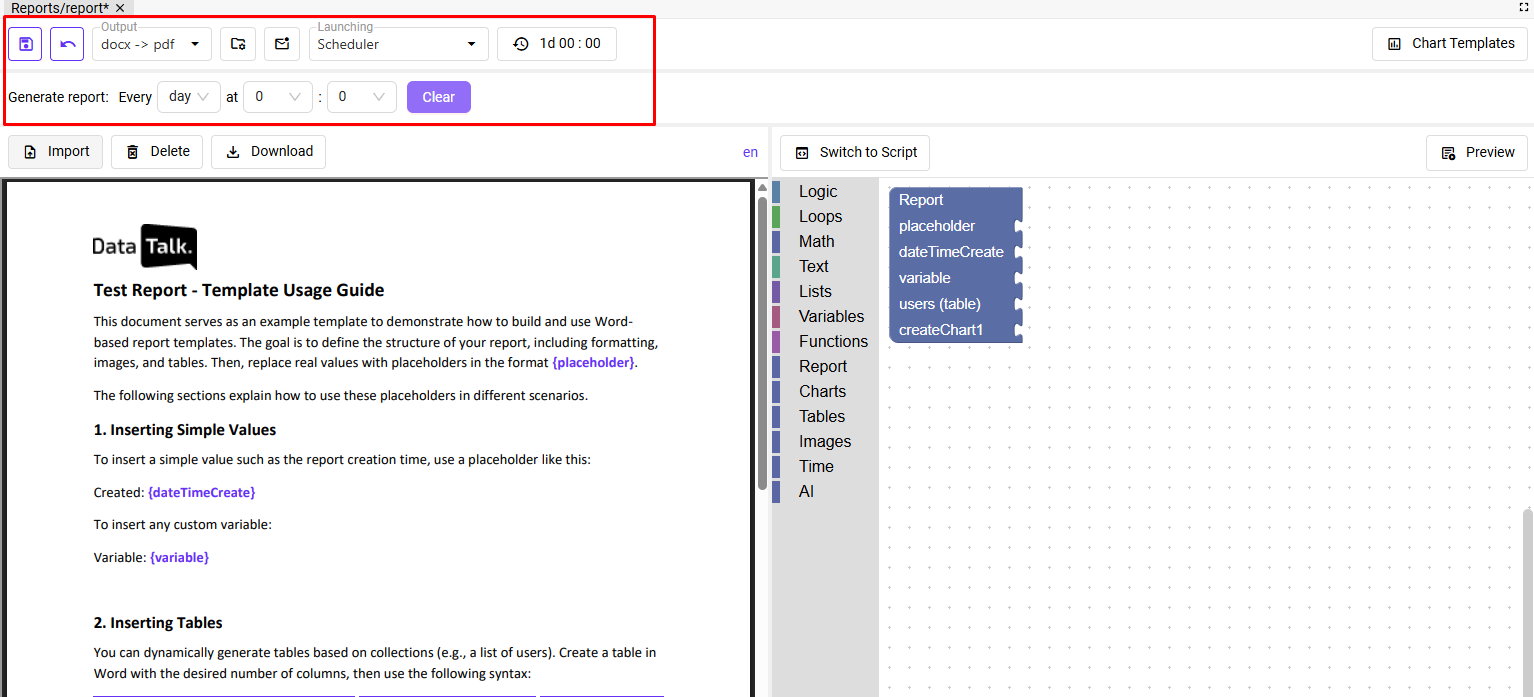
In the toolbar, set Output:
docx → pdf— converts the filled Word document to PDF (most common for distribution)docx— delivers the filled Word document directly
Set Launching to Scheduler for automatic generation. Then set Interval and the generation time:
- Interval — the period in
Xd HH:MMformat:1d 00:00= daily,7d 00:00= weekly - Generate report: Every [day] at [H] : [M] — the specific time within the period when the report fires
Click the save (floppy disk) icon. The report will generate automatically on the configured schedule.
Toolbar controls
Output — the output format dropdown (docx → pdf, docx, and other installed conversion formats).
Launching — when the report is triggered. Scheduler = automatic on a recurring interval.
Interval — the recurring period: 1d 00:00 means once per day at midnight. Format: Xd HH:MM.
Generate report: Every [day] at [H] : [M] — the exact time within the interval. Set H (0–23) and M (0–59) using the dropdowns. Clear resets both to zero.
Document management
Import — uploads a .docx file as the report template. The current template is replaced.
Download — downloads the current .docx template file for editing in Microsoft Word. After editing, re-import the updated file.
Delete — permanently removes the report definition from the project.
Language selector (en) — selects the language context when the project supports multiple locales.
File naming and storage
Generated reports are saved to the internal file store. You can define a destination folder for the output file and optionally enable automatic folder structuring based on time (daily, monthly, or yearly sub-folders).
File names support dynamic date variables. Use the Add date to name option to append the current date and time — for example {yyyy.MM.dd hh:mm:ss} — to the file name, making each generated report uniquely identifiable.
Reports can be sent as file attachments via configured notification services (email, Discord, and others). Not all services support attachments or may impose file size limits — verify with the provider. If delivery is enabled, the report is sent every time it is generated.
Generation triggers
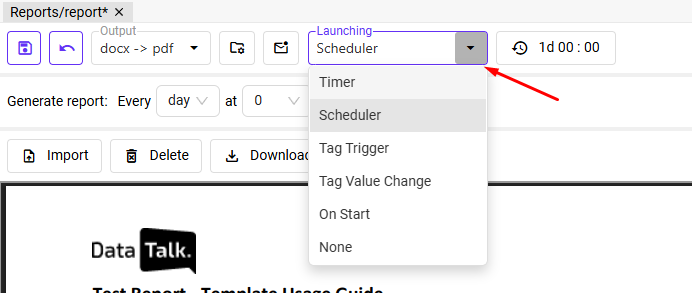
The Launching setting determines what event causes the report to generate. Six trigger modes are available:
Timer — generates the report at regular time intervals (for example, every 30 minutes) counted from the last save.
Scheduler — triggers generation at specific times, such as every full hour or on selected days. This is the most common mode for periodic reports.
Tag Trigger — generates a report when a specific tag reaches a defined value. For example, when a PLC sets a production-complete tag to 0, a shift report fires automatically.
Tag Value Change — generates a report whenever a specified tag’s value changes, regardless of the new value.
On Start — generates a report once when the DataTalk runtime starts.
None — the report is not generated automatically. It can still be triggered on demand via API or a custom script using the report’s unique ID.
The Preview button generates the report instantly with real data without waiting for the schedule. If a notification delivery channel is configured, Preview also sends the report through that channel — use it to verify both the output content and the delivery in one step.
Switch to Script
Switch to Script converts the block-based template editor to a JavaScript scripting interface. Script mode provides full programmatic control over report logic — complex conditional sections, dynamic chart selection, custom calculations — that are difficult to express with the block editor.
After editing in JavaScript mode, switching back to the block editor discards the script. Use Script mode for reports that genuinely require it, not as a starting point.
Every generated report is saved to the internal file store, accessible in the Files section of View Mode. Reports can also be delivered automatically via the channels configured in Notifications.