
Windows Installation
Step-by-step guide to install DataTalk Manager on Windows 11
DataTalk Manager runs on Windows 11 or newer (64-bit). The installer guides you through all required steps, including an automatic WSL Linux subsystem setup that runs after the first reboot.
- OS: Windows 11 or newer (64-bit)
- Virtualization: must be enabled in BIOS/UEFI settings (or inside your VM configuration)
- Ports: HTTP 80 and HTTPS 443 by default — can be changed during installation
- WSL: set up automatically after the first reboot
Installation video
Step-by-step installation
Double-click the downloaded .exe file. If prompted by Windows security, click Run anyway. Accept the License Agreement to continue.
Select the folder where DataTalk Manager should be installed. The default path is recommended for most users.
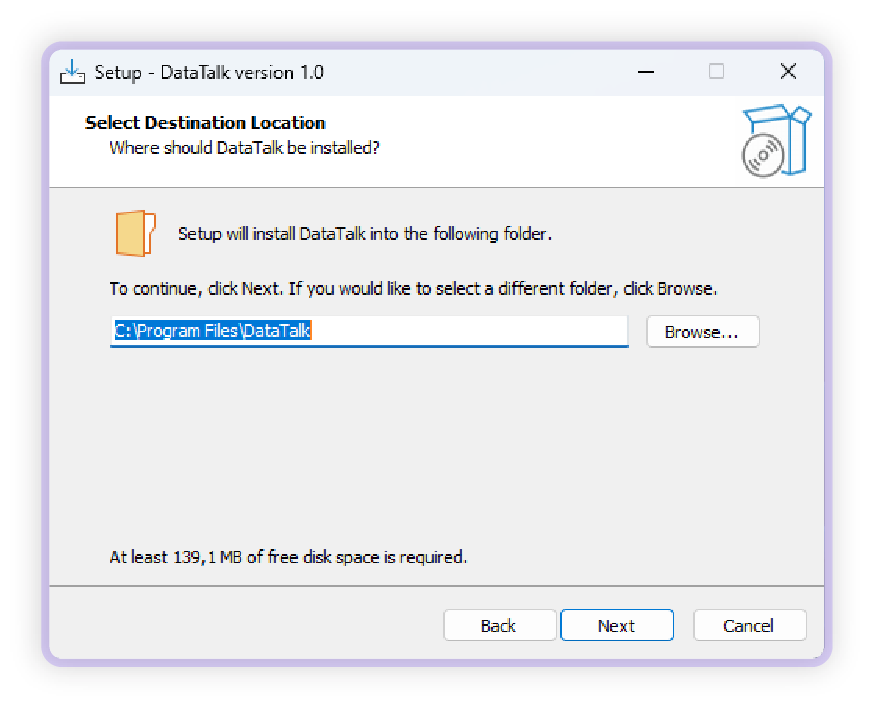
Optionally choose custom directories for the runtime and project files. Leave as default if unsure.
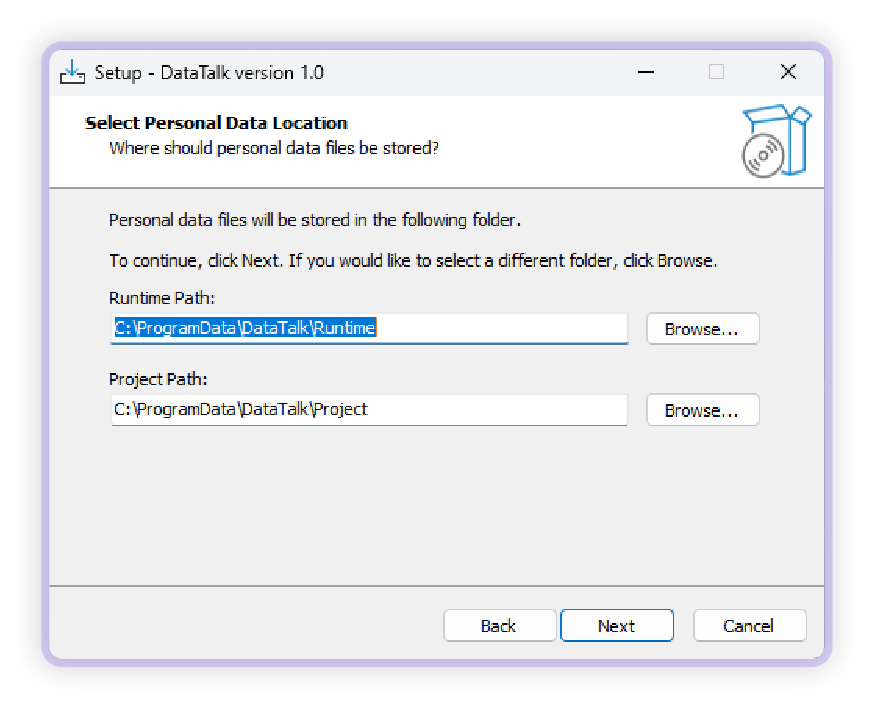
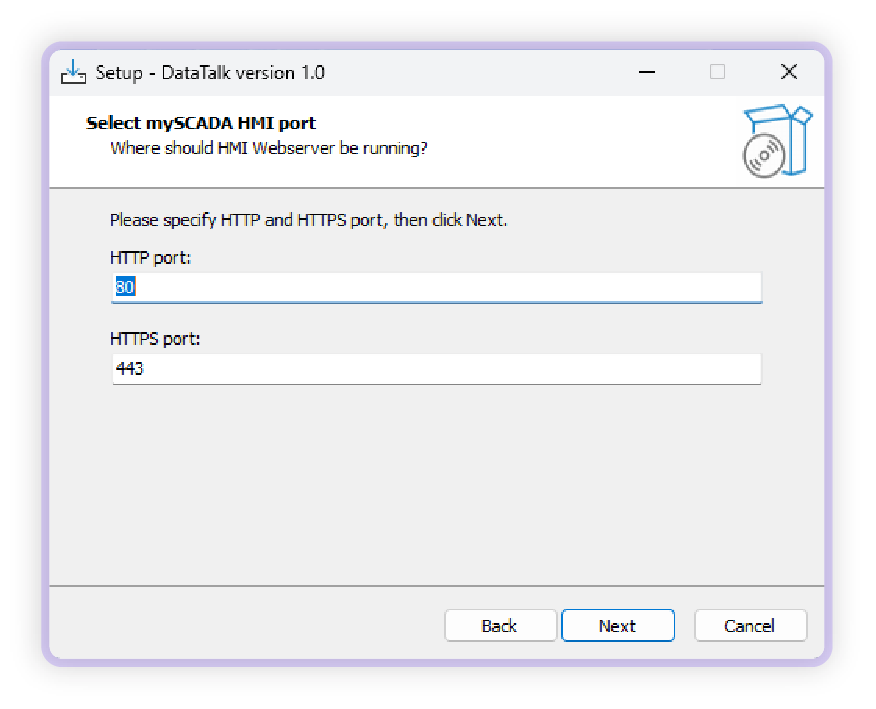
Choose the web server ports. The defaults are 80 (HTTP) and 443 (HTTPS). Change these only if another service already uses those ports.
Windows includes IIS (Internet Information Services) which uses port 80 by default. If IIS is active on your machine, either disable it or choose different ports for DataTalk.
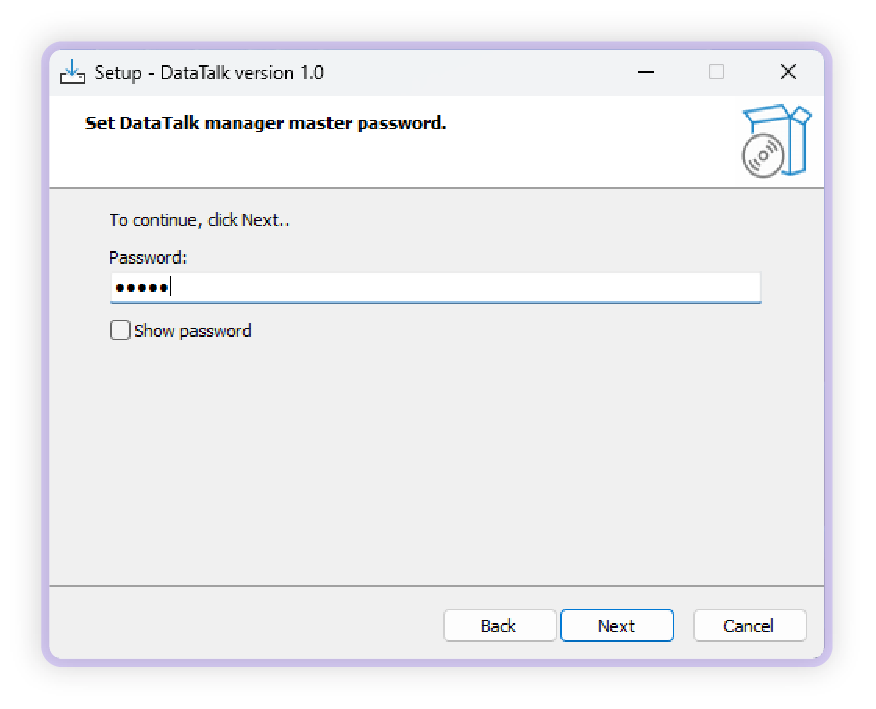
Create a secure password for DataTalk Manager. This password is required for any configuration changes and for starting or stopping the runtime.
The password cannot be reset without fully reinstalling DataTalk Manager. Store it in a safe place before continuing.
Review all selected directories and settings. If everything looks correct, click Install.
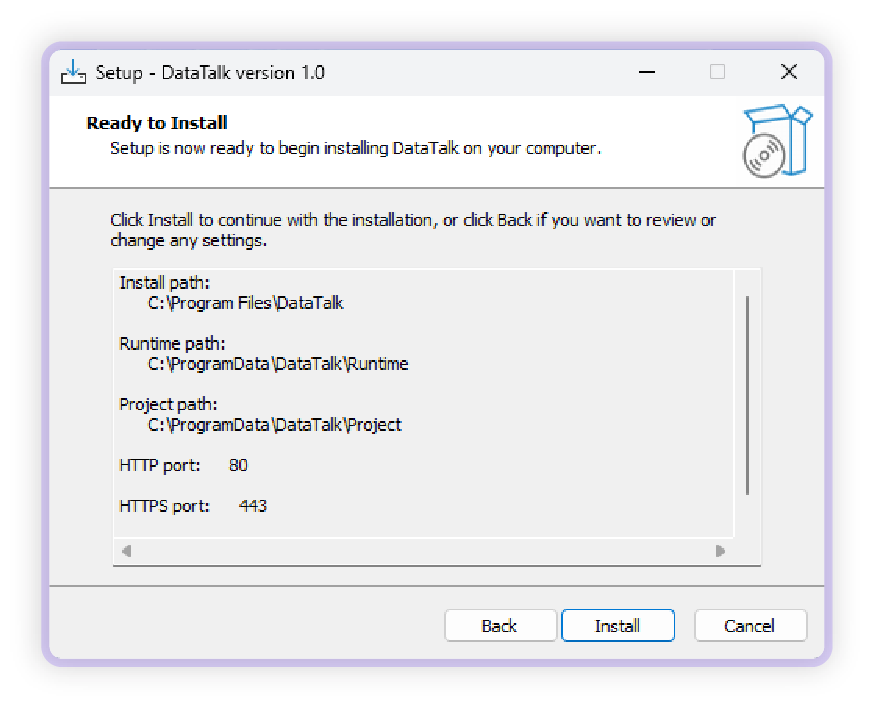
When installation finishes, reboot your computer. After reboot, DataTalk Manager will automatically launch a WSL (Windows Subsystem for Linux) setup wizard — accept all prompts to complete it.
DataTalk Manager will not work without the WSL subsystem. Do not skip or cancel the WSL setup wizard.

After WSL setup completes, DataTalk Manager starts automatically and downloads the latest runtime from the internet.
If no internet connection is available, download the runtime on a device with internet access, copy it to a USB drive, and import it manually from the DataTalk Manager UI.
If Windows is installed inside a VM (Proxmox, VMware, Hyper-V, etc.), nested virtualization must be enabled on the hypervisor. See the WSL2 Nested Virtualization guide.
Check the Troubleshooting guide for the most common installation issues, or contact support.