
Introduction
DataTalk Manager is a web-based administration panel that controls DataTalk runtime processes, manages software updates, handles licensing, and configures system-level settings for the device.
DataTalk Manager is the system management layer that sits beneath all DataTalk products. While products like the OT/IT Gateway handle data acquisition and forwarding, DataTalk Manager handles the device itself — starting and stopping runtime processes, installing software updates, managing licenses, and configuring system services such as the web server, user accounts, and remote access.
It runs as a lightweight web application on the device and is accessible from any browser on the local network, no client software required.
Dashboard
The main dashboard gives an at-a-glance view of the device’s current state.
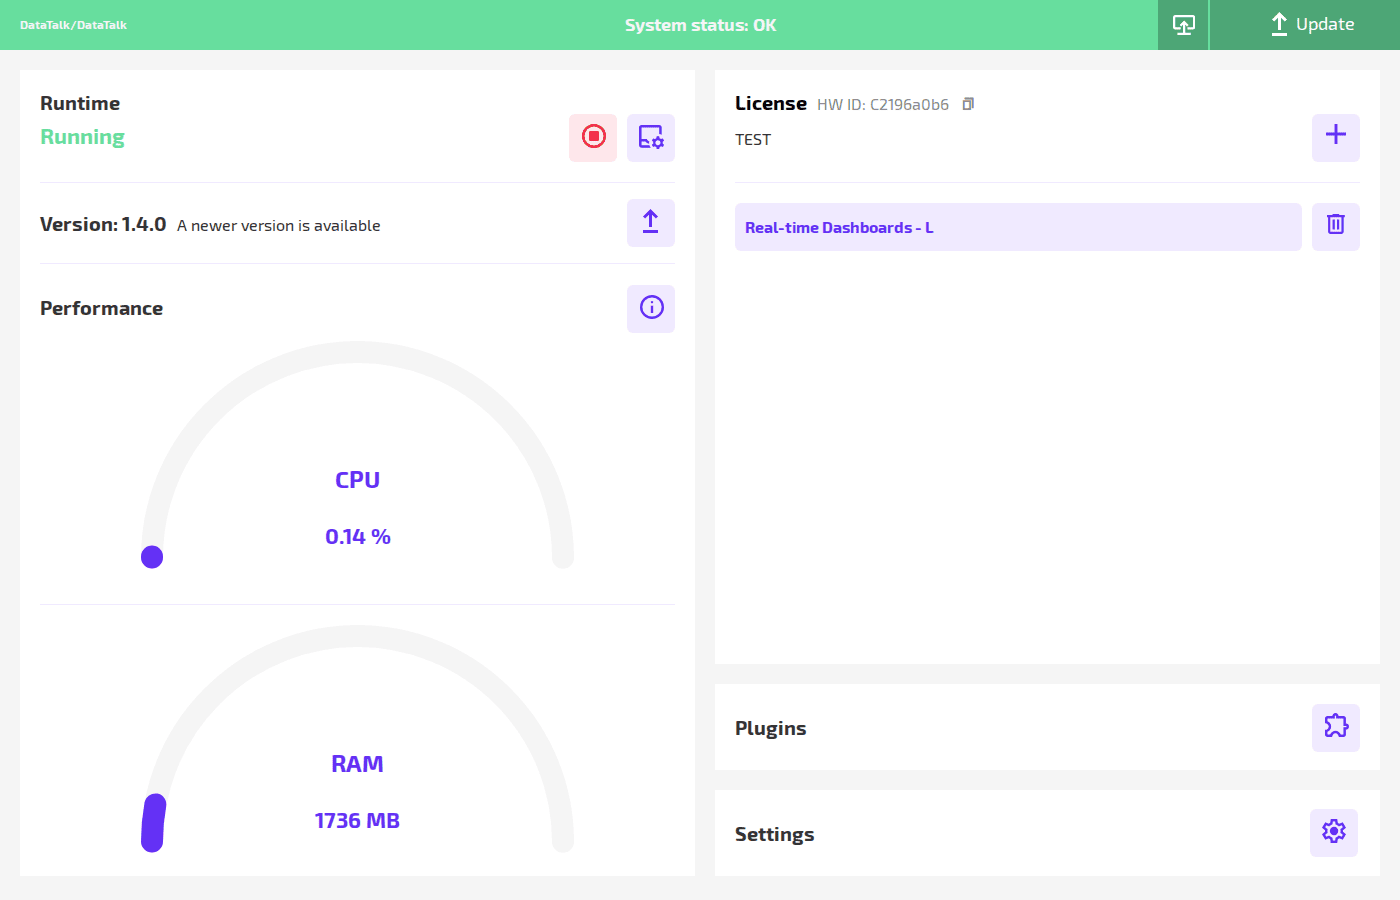
Left column:
Runtime — shows whether the DataTalk application runtime is currently running or stopped, along with two action buttons: start/stop and runtime configuration.
Version — displays the currently installed version (e.g. 1.4.0). If a newer version is available, a notice appears alongside an upload button for manual update.
Performance — two live gauges showing current CPU usage (%) and RAM usage (MB). Click the ⓘ info button to open the detailed process list.
Right column:
License — displays the device HW ID used for license generation, the currently active license, and a + button to add a new license.
Plugins — quick link to the plugin manager where optional runtime extensions can be downloaded and installed.
Settings — quick link to system settings (requires login).
Header status bar
The top bar changes color to reflect the system state:
Red — Runtime is stopped — the DataTalk application is not running. Data acquisition, protocol connections, and data servers are all inactive.
Green — System status: OK — the runtime is running normally.
The top bar also shows the current device name path (e.g. DataTalk/DataTalk) and the Update button for uploading a new firmware/software package.
Login
Settings and administrative functions are protected by a login. To access them, click the ⚙ gear icon in the Settings row at the bottom right of the dashboard. A login dialog appears.
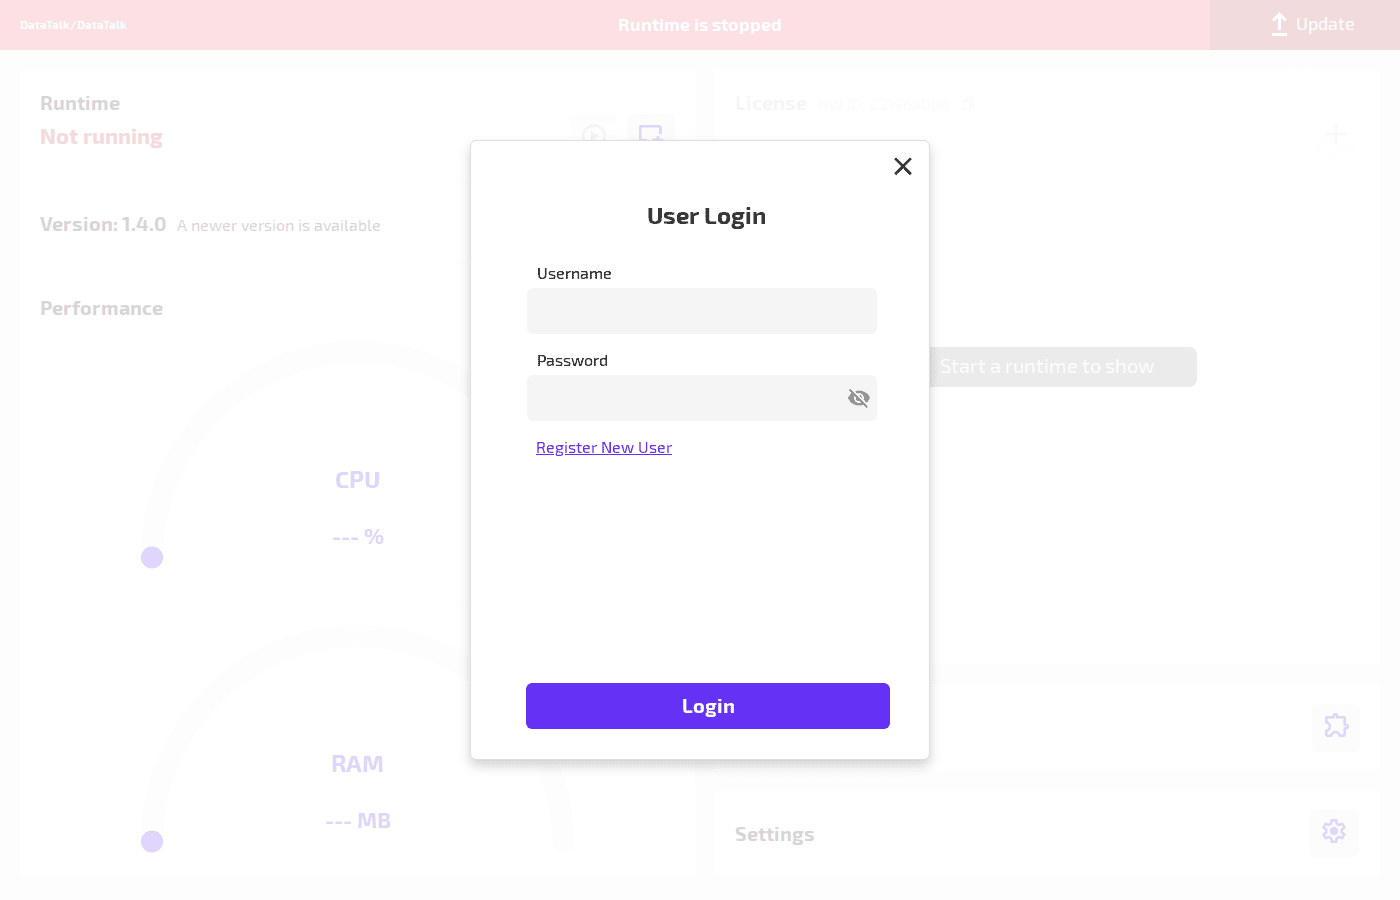
Enter your username and password, then click Login. The default administrator account is admin. After successful login the Settings panel opens directly.
A Register New User link in the login dialog opens a self-registration flow for creating additional accounts. Users created here can be assigned to groups and given 2FA in Users settings.