
General
System-wide settings — available interface languages, operator intervention logging, authentication security policy, and project lifecycle management.
On this page
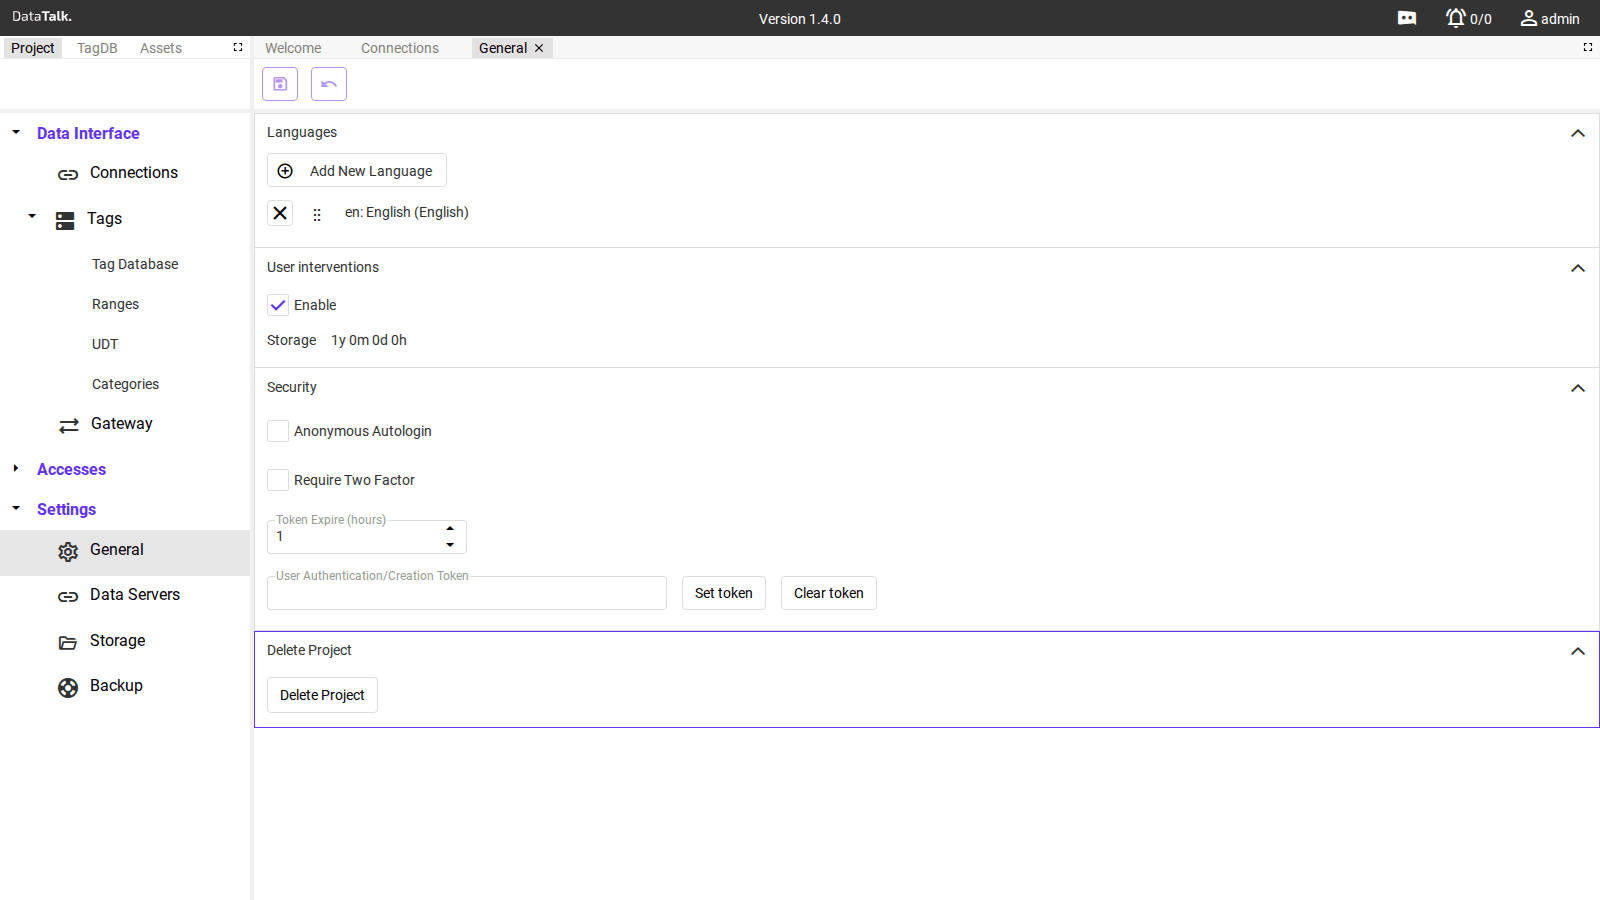
The General settings page covers system-wide configuration that applies across the entire project: language availability, audit logging, security policy, and project management.
Languages
Defines which interface languages are available for users to select in their profiles. Adding a language makes it selectable for individual users — it does not change the interface for everyone, and it does not change your project configuration in any way. Only the UI labels and menus change for users who select that language.
If your operators work in different languages, add all relevant locales here first, then each operator can choose their own language in their account settings. To add a language, click Add and select from the supported locales list. If a user’s selected language is later removed, they revert to the project default.
Translating texts
Next to Add New Language there are three more buttons:

| Button | What it does |
|---|---|
| Export Translations | Saves the texts of the project to a file, for example for an external translator. |
| Import Translations | Loads translated texts back into the project. |
| Autofill translations with AI | Lets the AI translate all texts that are still missing in the additional languages. |
Autofill translations with AI uses the AI provider that you set in AI Engineer, so that section has to be enabled and have a valid API key. There is no confirmation question — the translation starts as soon as you click the button, and a window shows the progress:
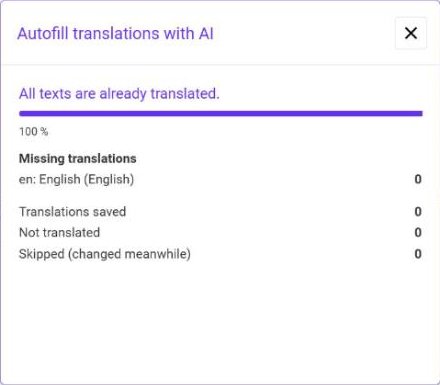
- Missing translations — the number of texts still missing in each language,
- Translations saved — texts that the AI translated and the project stored,
- Not translated — texts that the AI did not translate,
- Skipped (changed meanwhile) — texts that were changed while the translation was running.
When nothing is missing, the window reports All texts are already translated. Newly translated texts are saved in the project immediately, so create a backup in Settings → Backup before you translate a large project, and have the result checked by someone who speaks the language.
User Interventions
When enabled, every operator action that changes a value is recorded to the userLog with:
- The username of the operator
- The tag or object that was modified
- The previous and new value
- A precise timestamp
This creates a full audit trail of who changed what and when — important for regulated environments, shift handovers, and incident investigations. The userLog is only populated when this setting is enabled, so turn it on before operations begin if you need a complete record.
Storage — The retention period for the userLog, shown in years/months/days/hours (e.g., 1y 0m 0d 0h). Operator intervention records older than this limit are purged automatically. Adjust it on the Storage page.
Security
Anonymous Autologin — When enabled, the HMI loads without any login prompt. Anyone who can reach the gateway’s URL is automatically signed in and can interact with all HMI views and tag data. Intended only for physically isolated, trusted networks where access is controlled at the network perimeter.
Require Two Factor — When enabled, two-factor authentication (TOTP) becomes mandatory for all user accounts, not just those where 2FA is individually enabled. Turn this on to enforce a site-wide 2FA policy regardless of individual user settings.
Token Expire (hours) — How long a login session token stays valid after the last activity. Setting this to a short value (e.g., 1 hour) means idle sessions are automatically signed out. Increase it for operator workstations where re-authentication disrupts continuous operations.
User Authentication/Creation Token — A shared token used for programmatic account creation and authentication via the REST API. Click Set token to generate or set a value; click Clear token to revoke it. This token is separate from per-user API Tokens and is typically used only for automated provisioning workflows.
Never enable Anonymous Autologin on a gateway reachable from the internet or from any network that is not fully trusted. Every person who can reach the gateway’s IP address gains complete access to the HMI and all data.
Startup Screen
The Startup Screen setting defines the initial view displayed to all users when they access the web server or HMI, before any per-user override is applied. Configuring a startup screen ensures users are immediately directed to the most relevant information after login — for example the main plant overview or a critical process dashboard.
To set the startup screen:
Open General settings and scroll to the Startup Screen field.
Drag a view or component from the main project tree into the empty component box shown in the Startup Screen field.
Save the settings to apply the change. The selected view will be shown as the landing page for users who do not have a per-user startup screen configured on their account.
AI Engineer
AI Engineer brings artificial intelligence into the project design. It consists of two independent parts — you can use either of them or both:
- the built-in AI assistant, a chat panel directly in the Designer,
- the MCP server, through which you connect an external AI tool of your choice to the project.
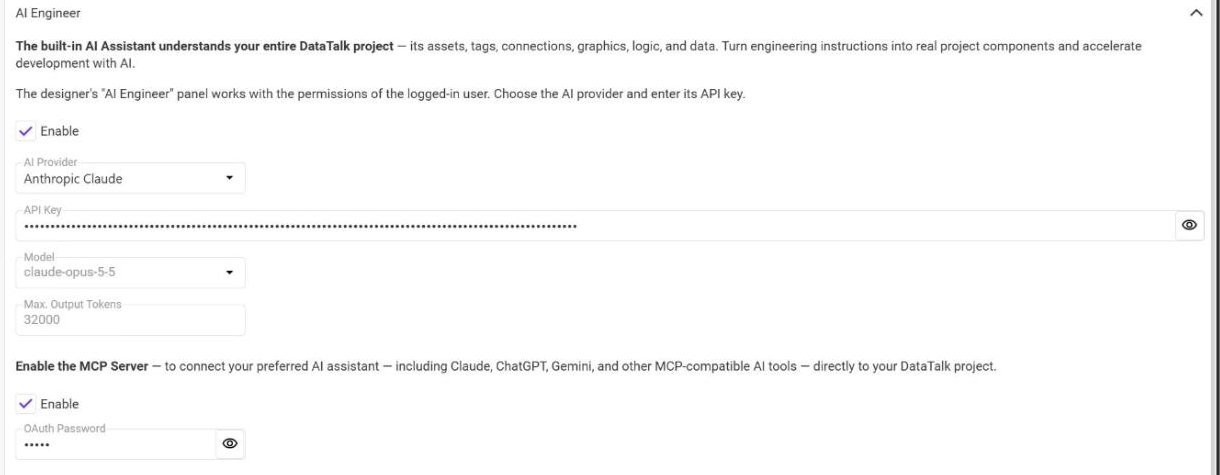
Built-in AI assistant
The assistant understands the whole project — assets, tags, connections, graphics, logic and data — and turns your instructions into real project components. Describe what you want to build, change or find, for example “Create a view with a gauge for tag 1.Motor.Speed”.
Setting it up
Open Settings → General, expand AI Engineer and tick Enable in the upper part (the assistant).
Select the provider and its model in AI Provider and Model:
| Provider | Models offered | Default |
|---|---|---|
| Anthropic Claude | claude-opus-5-5, claude-sonnet-5, claude-haiku-4-5 | claude-opus-5-5 |
| OpenAI | gpt-5, gpt-5-mini | gpt-5 |
| Google Gemini | gemini-2.5-pro, gemini-2.5-flash | gemini-2.5-pro |
| Ollama (runs on your own server) | qwen3, gpt-oss:20b, llama3.1 | qwen3 |
After you save the settings, the list of models is loaded from the provider. If that is not possible, the default models are shown.
Paste the API Key of your provider account. Use the eye icon to check what you typed. For Ollama you enter the address of the server instead of a key (by default http://localhost:11434), optionally an access token and the size of the context window (65 536 tokens by default).
Max. Output Tokens limits the length of a single answer of the assistant.
Save the General page. The assistant is active when it is enabled and has an API key (Ollama does not need a key).
Working with the assistant
The assistant opens from the AI Engineer tab on the right edge of the Designer. Write the request into the field at the bottom (Enter sends it, Shift+Enter starts a new line). While the assistant works, the panel lists the individual steps, for example Reading: views or Creating a tag, and then shows the answer. If a step fails, the assistant usually corrects it and tries again.
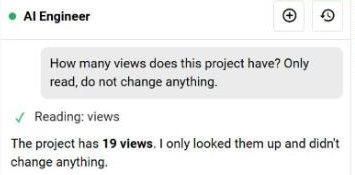
At the top of the panel you can start a new conversation and open the history of previous ones. Stop interrupts a running answer, and a conversation can be exported to a PDF.
- The assistant works with the permissions of the logged-in user.
- Its changes are saved immediately and there is no button to take them back. Before bigger changes create a backup in Settings → Backup.
- The assistant can make mistakes — check important results.
- Requests are billed by the provider of your API key. Ollama runs locally and has no per-request cost.
MCP server
The MCP server publishes the project to external AI tools that support the MCP protocol (Claude Desktop, Claude Code, ChatGPT, Gemini, Cursor…). Such a tool can then read and edit the project in the same way as the built-in assistant, but from its own environment — useful when you want to combine the project with other work (files, web, version control) or to make larger batch changes.
Setting it up
In AI Engineer tick Enable in the lower part (the MCP server).
Enter an OAuth Password — at least 5 characters, otherwise the settings cannot be saved. The AI tool asks for this password when it connects for the first time. Save the page.
In the AI tool add an MCP server with the address http://<address-of-the-server>/mcpdesigner. For Claude Desktop it looks like this in claude_desktop_config.json:
"datatalk-project-designer": {
  "command": "npx",
  "args": ["-y", "mcp-remote", "http://localhost/mcpdesigner"]
}
mcp-remote needs Node.js. If DataTalk runs on another computer, replace localhost with its address. Outside a local network use HTTPS.
What the AI tool can do
| Area | Examples |
|---|---|
| Connections | Create, edit and delete connections — Modbus, OPC UA, MQTT, EtherNet/IP, databases, REST API, Loxone… |
| Tags | Tags, UDT, ƒx templates and formulas, ranges, limit templates. |
| Views | SVG graphics, inserting components and symbols, animations, commands, opening views, portrait layout, dark mode, translations of texts. |
| Other | Dashboards, charts, tables and linked tables, scripts and custom components. |
What it cannot do
- It does not see the result. The tool works with the drawing data, not with a picture of the screen — check layouts and colors yourself.
- It does not read or write live values of tags, manage users and permissions or delete the project. It designs the project; it does not control the running process.
- Its changes are saved immediately as well — make a backup first.
The AI Expert settings of the project contain a separate MCP Server switch for the AI assistant that works with the current data of the running system. It belongs to the AI Module and has nothing to do with AI Engineer.
Which one to use
| Built-in assistant | MCP server | |
|---|---|---|
| Best for | Quick changes directly in the Designer | Larger batch changes, work together with other tools |
| You need | An API key of an AI provider | An AI tool that supports MCP and the OAuth password |
Delete Project
Permanently removes the entire project — all connections, tags, HMI views, equations, settings, users, and access configurations. The gateway resets to a blank state. This action cannot be undone.
Go to Backup and create a backup that includes Project, User Data, and Historical Data. Download the backup file to a location outside the device before proceeding.